Ever wondered how that intricate company logo gets perfectly stitched onto uniforms? Or how complex artwork transforms into flawless embroidery? The secret lies in using a professional embroidery digitizing service – the crucial bridge between your digital design and physical stitching. This specialized embroidery digitizing service transforms your artwork into a language embroidery machines understand, determining stitch types, densities, and sequences that make or break your final product.
Before you rush to order from an embroidery digitizing service, there are crucial factors you should understand to get the best results for your money. Not all digitizing is created equal, and choosing the wrong embroidery digitizing service can lead to puckered fabrics, broken threads, or designs that simply don’t look like your original artwork. The quality of your embroidery digitizing service directly impacts how your brand appears on uniforms, how long your embroidered products last, and ultimately, your customer satisfaction.
This comprehensive guide walks you through everything you need to know – from file requirements and turnaround times to pricing structures and quality indicators – helping you make informed decisions when working with embroidery digitizing services. Whether you’re a small business owner branding company apparel, a crafter creating custom gifts, or a promotional product supplier serving multiple clients, these insights will help you navigate the world of professional digitizing to save time, money, and frustration while achieving stunning embroidered results.
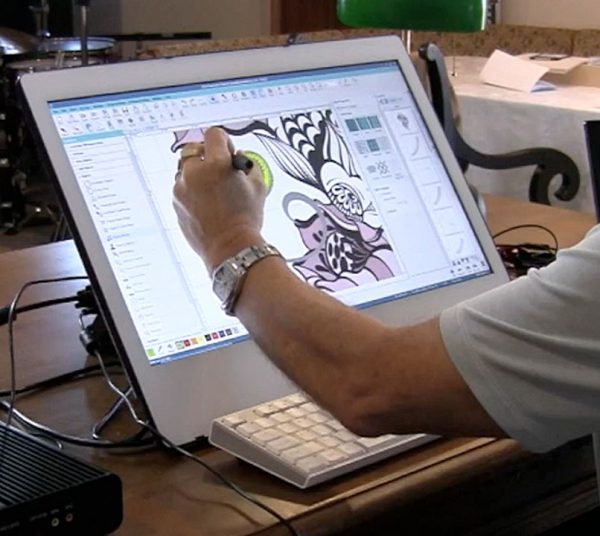
Embroidery digitizing is the process of converting artwork into a digital file that embroidery machines can read. Unlike simple image files, these specialized instructions tell the machine exactly:
- Where to place each stitch
- What colors to use
- What stitch types work best
- How to sequence the design
Think of it like creating a roadmap for your embroidery machine. Without proper digitizing, even the best artwork can turn into a tangled mess of thread.
Professional digitizers typically need your artwork in:
- Vector files (AI, EPS, PDF) for clean scaling
- High-resolution PNG/JPG (300+ DPI) for detailed designs
- Clear specifications about size and placement
Tip: Always provide the largest, cleanest version of your logo. “We can work with anything” often means compromised quality.
Quality digitizing uses different stitch techniques:
- Satin stitches for smooth text and borders
- Fill stitches for solid areas
- Running stitches for fine details
- Underlay stitches for stability
Ask your provider which techniques they’ll use for your specific design.
Digitizing costs vary based on:
- Complexity: Simple logos start around $15, while detailed artwork can cost $100+
- Stitch count: More stitches = longer machine time = higher cost
- Urgency: Rush jobs typically carry 25-50% premiums
- Revisions: Some include free tweaks, others charge per edit
Always get a detailed quote upfront to avoid surprises.
Standard processing takes:
- 24-48 hours for most providers
- 3-5 days during peak seasons
- Immediate (but costly) for rush jobs
Plan ahead if you have strict deadlines.
Look for:
- Experience with your specific fabric types
- Samples of previous work
- Knowledge of your machine’s format (PES, DST, etc.)
- Responsive customer service
A $10 Fiverr gig might seem tempting, but poor digitizing leads to:
- Broken threads during production
- Distorted logos
- Unnecessary thread changes
- Embroidery that doesn’t last
The same design needs different settings for:
- Stretchy t-shirt fabric
- Stiff caps
- Thick towels
- Delicate silks
Always tell your digitizer what material you’re using.
A design that looks great at 4″ might become unrecognizable at 1.5″. Discuss:
- Minimum readable size
- Optimal dimensions for your application
- Any special scaling needs
Before mass production, always request:
- A digital preview (showing stitch direction and color blocks)
- A physical sample on your actual fabric
- Close-up photos of complex areas
Red flags include:
- Loopy or loose stitches
- Jagged curves
- Poor registration (misaligned elements)
- Excessive thread breaks
While DIY digitizing software exists (like Hatch or Wilcom), professional services make sense when:
- You need consistent, production-quality results
- Your design has complex elements
- You’re working with challenging fabrics
- Time is more valuable than the learning curve
- What file formats do you deliver?
- Do you offer free revisions?
- Can you provide references?
- How do you handle rush orders?
- What’s your experience with [your specific industry]?
- Specialized digitizing companies
- Embroidery machine dealers
- Industry trade groups
- Word-of-mouth referrals
- Submit your artwork with clear instructions
- Receive a quote and timeline
- Approve the design proof
- Get your final files (typically in multiple formats)
- Test stitch before full production
Quality embroidery starts with quality digitizing. By understanding these key factors before ordering, you’ll get better results, avoid costly mistakes, and build relationships with reliable providers. Remember – great digitizing might cost more upfront, but pays off in reduced thread breaks, better-looking products, and happier customers.
Ready to transform your designs? Start conversations with 2-3 providers today, compare their processes, and take the first step toward flawless embroidery.
Have questions about a specific project? Drop them in the comments below!